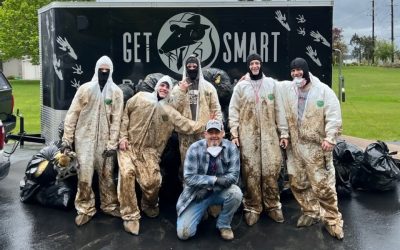
In our previous three smart processes, we covered: Step 1 – Identify Source, Step 2 – Eliminate Pests, Step 3 – Access Points. Step 4 addresses every step of properly removing dead pests and debris, offering tips on prevention, cleanup, safety, and maintenance to ensure your living space remains healthy and pest-free.
Understanding the Need for Safe Pest Removal
Dead pests are more than just an eyesore or an unpleasant smell. They can carry bacteria, parasites, and viruses long after death. Rodents and insects in particular often die in hard-to-reach areas, such as inside walls, attics, or crawlspaces, which can make removal difficult and increase the risk of contamination.
In the Pacific Northwest, common culprits include:
- Rodents (mice, rats): Often seek shelter in attics and basements during the colder, wetter months.
- Insects (carpenter ants, termites, wasps): Found near wood structures and nesting in crevices.
- Birds and small wildlife (bats, squirrels, raccoons): Occasionally find their way into attics or chimneys, especially during nesting season.
Proper removal not only eliminates odors but also prevents secondary pest infestations, such as maggots, beetles, or scavengers.
Step 1: Identifying the Presence of Dead Pests
Sometimes, the first sign of a dead pest is not visual. More often than not, it’s a smell — a pungent, rotting odor that grows stronger over days. In other cases, you might notice:
- An increase in flies or beetles in a specific area
- Stains on walls or ceilings
- Pets showing intense interest in a spot indoors
- Discoloration or sagging drywall
Locating the Source
Begin by narrowing down the odor. Smells travel along air currents, especially through ductwork or insulation. Use your nose to trace the strongest source. Be systematic: start at the baseboards, move toward vents, and inspect attic crawlspaces. For homes in wooded Pacific Northwest areas, pay particular attention to:
- Chimneys (especially unused ones)
- Crawlspaces (where rodents or raccoons may die)
- Insulation (a popular nesting and dying spot for mice)
- Under porches or decks (frequent locations for animal activity)
A thermal imaging camera, available for rent at many hardware stores, can help you detect body heat or decaying remains behind walls or under floors.
Step 2: Gathering the Right Supplies
Before attempting removal, gather appropriate personal protective equipment (PPE) and cleaning materials. In the Pacific Northwest, mold and mildew can also be present alongside decomposing organic matter due to moisture.
Essential tools and supplies include:
- Disposable gloves (latex or nitrile)
- Respirator or face mask (N95 or higher)
- Safety goggles
- Trash bags (double-layered or contractor-grade)
- Paper towels or rags
- Disinfectant (bleach solution or enzyme-based cleaner)
- Sealable plastic containers (for specimen removal)
- Flashlight or headlamp
- Tongs or disposable scooper
- Plastic sheeting or old towels (to protect floors)
Optional but helpful:
- Pest control mirror (for looking into tight spaces)
- Small ladder
- Air purifier (to assist with odor control during and after cleanup)
Step 3: Removing the Carcass
Small Pests (Insects, Mice, Birds)
Once located, use gloved hands or tongs to gently remove the body. Place it directly into a sealable bag or lidded container. Avoid puncturing the skin, as this can release bodily fluids. If the pest has decomposed significantly, scoop up remains and surrounding material — insulation, nesting debris, droppings — and dispose of all of it together.
Larger Pests (Rats, Squirrels, Raccoons)
For larger animals, it’s important to avoid direct contact. If the animal is too decayed to lift intact, double-bag smaller pieces. Consider using a dustpan or cardboard for scooping. If maggots are present, sprinkle diatomaceous earth or boric acid to dry them out before removal.
Special Consideration: Wall Cavities
If the animal died within a wall and cannot be reached from above or below, you may need to cut a small access hole. Use a drywall saw and make a 6-12” opening where the odor is strongest. Once removed, disinfect thoroughly and patch the hole using a drywall repair kit.
Step 4: Cleaning and Disinfecting the Area
Even after removal, the surrounding area may still harbor bacteria, waste, or parasites. Cleaning is essential not just for hygiene, but also to eliminate pheromones that could attract other pests.
Disinfecting Surfaces
Use a bleach-based solution (1 part bleach to 10 parts water) or an enzymatic cleaner designed to break down organic material. Spray generously on any surface that came in contact with the pest, including:
- Walls, floors, beams
- Insulation
- HVAC vents
- Nearby storage items
Let the disinfectant sit for at least 10 minutes before wiping. Repeat the process for heavily contaminated zones.
Removing Odors
Odors from decomposition can linger in porous surfaces. Use odor-neutralizing sprays, but also consider:
- Baking soda: Sprinkle and let sit for 24 hours before vacuuming
- Charcoal or activated carbon filters: Placed near the affected zone
- White vinegar bowls: For mild to moderate smells in smaller spaces
Persistent odors may require professional-grade ozone treatment, especially in tightly sealed modern homes.
Step 5: Disposing of Waste Properly
Do not throw dead animals directly into outdoor trash bins unless they are securely double-bagged. In many Pacific Northwest cities, including Seattle and Portland, local ordinances prohibit improper disposal of animal remains due to health risks.
What to Do:
- Double-bag all waste and seal tightly.
- Clearly label the outside of the bag if disposing through garbage pickup.
- For larger animals, contact local animal control or sanitation services — many municipalities offer pickup for dead wildlife.
- Never bury animals near vegetable gardens or near water sources; this can contaminate the soil.
Check with your local solid waste or animal control department for specific disposal guidelines.
Step 6: Preventing Future Incidents
Once the cleanup is complete, it’s important to understand how the pest got in and how to stop it from happening again. The Pacific Northwest’s rainy climate and abundant greenery make homes especially vulnerable to recurring pest issues.
Home Sealing
Inspect the exterior of your home:
- Seal gaps around windows, doors, and foundations.
- Install mesh covers over vents and chimneys.
- Use steel wool to plug holes where rodents could enter (they can’t chew through it).
- Trim branches that touch or overhang the house, as they act as highways for pests.
Moisture Control
Damp environments attract pests and aid decomposition:
- Use dehumidifiers in basements and crawlspaces.
- Fix leaky pipes and clogged gutters.
- Insulate crawlspaces with vapor barriers.
Regular Inspection
Perform routine checks of attics, basements, sheds, and garages — especially in early spring and fall when pest activity peaks.
Consider hiring a local pest control company for an annual inspection. Many in the Pacific Northwest offer eco-friendly and humane solutions tailored to local wildlife.
When to Call a Professional
While many dead pest situations can be handled by homeowners, certain scenarios warrant professional help:
- Heavy infestations (multiple carcasses, large nests, or colonies)
- Unreachable carcasses (deep inside walls or vents)
- Suspected disease risk (e.g., dead bats or raccoons)
- Biohazard-level contamination (significant feces, mold, or body fluid)
Professional biohazard cleaners use specialized tools, PPE, and disposal methods to ensure complete sanitation. They also often have infrared cameras and odor-neutralizing ozone machines.
In the Pacific Northwest, search for local “biohazard cleanup” or “dead animal removal” services with certifications in hazardous waste disposal.
Conclusion: A Cleaner, Healthier Home
The Pacific Northwest is a beautiful place to live, but its environment makes pest management an ongoing responsibility. By acting quickly and following best practices for removal, cleanup, and prevention, you can protect your family and property from the health risks associated with dead pests and their debris.
Staying proactive — sealing your home, managing moisture, and performing routine checks — goes a long way toward keeping pests outside where they belong. And when needed, don’t hesitate to call in professionals who know the local ecosystem and its unique pest pressures.
After all, a clean, pest-free home isn’t just about comfort — it’s about health, safety, and peace of mind.